Container based virtualization uses kernal on the host's OS to run multiple guest instances

Docker Engine
 $ docker run hello-world
1. The Docker client contacted the Docker daemon.
2. The Docker daemon pulled the "hello-world" image from the Docker Hub.
3. The Docker daemon created a new container from that image which runs the
executable that produces the output you are currently reading.
4. The Docker daemon streamed that output to the Docker client, which sent it
to your terminal.
Docker Hub - is the public registry that contains a large number of images available for your use.
$ docker images -> displays local images
Creating a Container
 The above example will download the image ubuntu, if it doesn't exist in your local.
and then run the container and execute the command echo "Hello world"
Container with Terminal
docker run -i -t ubuntu:latest /bin/bash
docker ps -a -> list the containers which are stopped as well
Running in Detached Mode [ background or as a daemon]
use -d flag
docker run -d centos:7 ping 127.0.0.1 -c 50
to observe output - docker logs <containerId>
Run Web App container - Port mapping
docker run -d -P tomcat:7
docker ps
- containers port 8080 is mapped to a random port on your host machine
docker commands
1. Docker Commit - saves changes in a container as a new image
docker commit [options] [container ID/name] [repository:tag]
ex:- docker commit 984d25f4554 prashanthmamidi/myapplication:1.0

2. Docker file - a config file that contains instructions for building a Docker image
 Each RUN instruction will execute the command on top writable layer and perform a commit of the image.
Can aggregate multiple RUN instructions by using "&&"
RUN apt-get update && apt-get install -y curl \
vim
Now, run the Docker Build command
docker build -t [repository:tag] [path]
path-> build context [normally it will be the current folder .], where it will look for docker file
docker build -t prashanthmamidi/myapplication:1.0 .
CMD Instruction - defines a default command to execute when a container is created
CMD ping 127.0.0.1 -c 30 -> Shell format
CMD ["ping", "127.0.0.1", "-c", "30"] -> Exec format
ENTRYPOINT Instruction - defines the command that will run when a container is executed
ENTRYPOINT ["ping"]
ENTRYPOINT can't override at run-time whereas with CMD we can override.
Start and Stop Containers
docker ps -a -> list all containers
docker start <containerID>
docker stop <containerID>
Getting terminal access
docker exec - starts another process within a container
docker exec -i -t [container ID] /bin/bash
Deleting containers - can only delete containers have have been stopped
docker rm <container Id/name>
docker rm -f $(docker ps -aq) -> delete all containers
Deleting local Images
docker rmi [image ID]
docker rmi [repo:tag]
Docker Hub Repositories
- can create own repositories on Docker Hub [Public /Private]
- can also push local images to a repository
- ensure that the local image we are pushing should have the same as the repository in the docker hub.
docker tag <oldrepo> <newrepo> -> renames the image
docker push <repo:tag>

Mount volume
 In Docker File
VOLUME instruction - creates a mount point
VOLUME /myvol -> String
VOLUME /www/website1.com /www/website2.com -> String with multiple volumes
VOLUME ["myvol", "myvol2"] -> JSON
-> good for sharing data between containers
Ex:
Execute a new container and initialise a volume at /www/website
docker run -d -P -v /www/website ubuntu:14.04
docker exec -it <containerID> bash
Now, go the folder www/website and create a file xx.txt
Now, exit from the container and stop it
docker stop <container Id>
Now ,commit the updated container as a new image
docker commit <container Id> test:1.0
run the new container from the newly created image
docker run -it test:1.0 bash
Now, go the folder www/website, you can see that there's no file as it's excluded while updating an image.
Mapping ports
Map exposed container ports to ports on the host machine
docker run -d -p 8080:80 nginx:1.7
Maps port 80 on the container to 8080 on the host
Automapping ports - use option -P
works only in EXPOSE instruction

Linking Containers

Creating a link Ex:-
 Here, while creating recipient container use --link <name of source container>:<alias>
docker run -d --name dbms postgres -> create the source container
Now, create the recipient container
docker run -it --name webClient --link postgresDB:db ubuntu:14.04 bash
check cat /etc/hosts, you can see an entry like
172.17.0.5 db bd526ce6a1da postgresDB
exit the container, verify the IP address
docker inspect postgresDB | grep IPAddress

Traditional CI
 Using Docker
 Here, the image will be pushed to the Docker Hub and the any other Host [QA/Prod] will pull the image from the Docker Hub and then run the container, which starts your application.
Docker Hub Auto Build

Docker Operations
Container Troubleshooting
docker logs <container name/id>
docker inspect <container name/id> | grep IPAddress
Private Registry
- run the resistry inside a container
- use the registry image at https://registry.hub.docker.com/u/library/registry/
docker run -d -p 5000:5000 registry:2.0
Push and Pull from private registry

Docker Machine
- is a tool that automatically provisions Docker hosts and install Docker Engine on them.
Docker Swarm
- is a tool that clusters Docker hosts and schedules containers
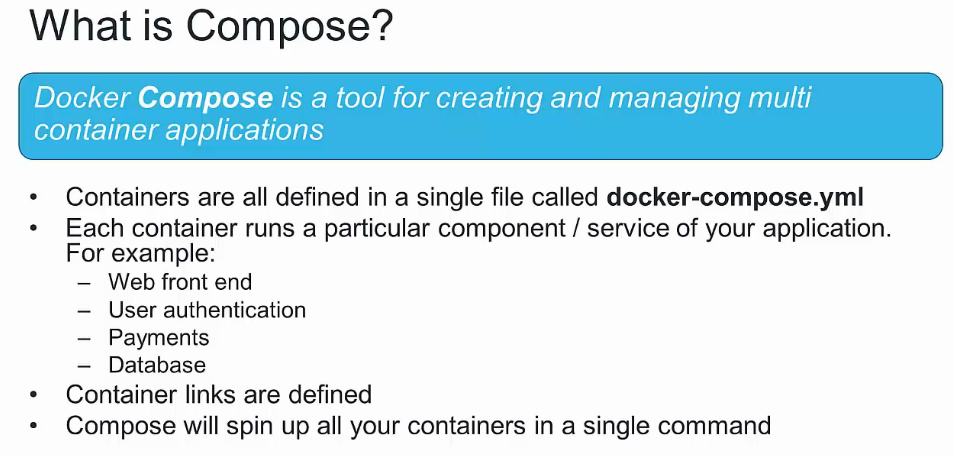
 Docker Compose
- is a tool for creating and managing multi container applications

 All services must have either a Build or Image Instruction.
To run the application,
docker-compose up
-Build the image for each service
-Create and start the containers

Docker Engine

1. The Docker client contacted the Docker daemon.
2. The Docker daemon pulled the "hello-world" image from the Docker Hub.
3. The Docker daemon created a new container from that image which runs the
executable that produces the output you are currently reading.
4. The Docker daemon streamed that output to the Docker client, which sent it
to your terminal.
Docker Hub - is the public registry that contains a large number of images available for your use.
$ docker images -> displays local images
Creating a Container

and then run the container and execute the command echo "Hello world"
Container with Terminal
docker run -i -t ubuntu:latest /bin/bash
docker ps -a -> list the containers which are stopped as well
Running in Detached Mode [ background or as a daemon]
use -d flag
docker run -d centos:7 ping 127.0.0.1 -c 50
to observe output - docker logs <containerId>
Run Web App container - Port mapping
docker run -d -P tomcat:7
docker ps
- containers port 8080 is mapped to a random port on your host machine
docker commands
Building Images
1. Docker Commit - saves changes in a container as a new image
docker commit [options] [container ID/name] [repository:tag]
ex:- docker commit 984d25f4554 prashanthmamidi/myapplication:1.0

2. Docker file - a config file that contains instructions for building a Docker image

Can aggregate multiple RUN instructions by using "&&"
RUN apt-get update && apt-get install -y curl \
vim
Now, run the Docker Build command
docker build -t [repository:tag] [path]
path-> build context [normally it will be the current folder .], where it will look for docker file
docker build -t prashanthmamidi/myapplication:1.0 .
CMD Instruction - defines a default command to execute when a container is created
CMD ping 127.0.0.1 -c 30 -> Shell format
CMD ["ping", "127.0.0.1", "-c", "30"] -> Exec format
ENTRYPOINT Instruction - defines the command that will run when a container is executed
ENTRYPOINT ["ping"]
ENTRYPOINT can't override at run-time whereas with CMD we can override.
Managing Images and Containers
Start and Stop Containers
docker ps -a -> list all containers
docker start <containerID>
docker stop <containerID>
Getting terminal access
docker exec - starts another process within a container
docker exec -i -t [container ID] /bin/bash
Deleting containers - can only delete containers have have been stopped
docker rm <container Id/name>
docker rm -f $(docker ps -aq) -> delete all containers
Deleting local Images
docker rmi [image ID]
docker rmi [repo:tag]
Docker Hub Repositories
- can create own repositories on Docker Hub [Public /Private]
- can also push local images to a repository
- ensure that the local image we are pushing should have the same as the repository in the docker hub.
docker tag <oldrepo> <newrepo> -> renames the image
docker push <repo:tag>
Volumes

Mount volume

VOLUME instruction - creates a mount point
VOLUME /myvol -> String
VOLUME /www/website1.com /www/website2.com -> String with multiple volumes
VOLUME ["myvol", "myvol2"] -> JSON
-> good for sharing data between containers
Ex:
Execute a new container and initialise a volume at /www/website
docker run -d -P -v /www/website ubuntu:14.04
docker exec -it <containerID> bash
Now, go the folder www/website and create a file xx.txt
Now, exit from the container and stop it
docker stop <container Id>
Now ,commit the updated container as a new image
docker commit <container Id> test:1.0
run the new container from the newly created image
docker run -it test:1.0 bash
Now, go the folder www/website, you can see that there's no file as it's excluded while updating an image.
Container Networking Basics
Mapping ports
Map exposed container ports to ports on the host machine
docker run -d -p 8080:80 nginx:1.7
Maps port 80 on the container to 8080 on the host
Automapping ports - use option -P
works only in EXPOSE instruction

Linking Containers


docker run -d --name dbms postgres -> create the source container
Now, create the recipient container
docker run -it --name webClient --link postgresDB:db ubuntu:14.04 bash
check cat /etc/hosts, you can see an entry like
172.17.0.5 db bd526ce6a1da postgresDB
exit the container, verify the IP address
docker inspect postgresDB | grep IPAddress

Docker in Continuous Integration
Traditional CI


Docker Hub Auto Build

Docker Operations
Container Troubleshooting
docker logs <container name/id>
docker inspect <container name/id> | grep IPAddress
Private Registry
- run the resistry inside a container
- use the registry image at https://registry.hub.docker.com/u/library/registry/
docker run -d -p 5000:5000 registry:2.0
Push and Pull from private registry

Docker Machine
- is a tool that automatically provisions Docker hosts and install Docker Engine on them.
Docker Swarm
- is a tool that clusters Docker hosts and schedules containers

- is a tool for creating and managing multi container applications

To run the application,
docker-compose up
-Build the image for each service
-Create and start the containers


